Tuesday 12 July 2011

A very large picture.

Here is a large resolution picture for your interest.

Suspension lubrication nipples.

Close up shot of the armoured cover for the suspension lubricating nipples. I made one master and cast the rest.

The cover in place with the locking handles, this is wrong but I'm too lazy to change it.

I made one set of lubricating nipples just to show how it looks.

Another shot, you can see the subtle indentation of the cast armoured door.

Later construction.

A close up of the front bow section.

Side view with a lot of detail added, still with the incorrect large turret mounted.

Again with the wrong turret and old mantlets and cupola, these were all rebuilt.

Finally a shot showing the corrected turret but still the old cupola.

Another earlier shot.

New turret added, I still have problems comming to terms with the size, after seeing it with the bigger incorrect turret the new one looks very small to me.  

Low down rear view.

Nice overhead view, note how the turret is offset to the left to make room for the hull gun I think. 

Showing the engine decking.

In case you wondered what I look like thats me in my back yard.

Early construction.

The are just some image of early progress in the construction, to show that everything must start somewhere. Seen above with no bolt heats and only a section of track complete.

Next to the Tamiya kit to give some idea of the size.

Left hand side view, the wheels haven't been added yet just a piece of wood to give it the height.

The rear, with some bolts added, not much else.

The side view shows how bare she actually is, this is not the turret seen in later consctruction, it is much too large and incorrectly shaped. 

At this point the lower suspension plate is just held in place with a spring clip.

Driving levers.

The rough lever brackets being glued together. The levers have already heat formed to give the subtle bends and shapes, the handles have been glued on.    
A close up of the rough beginning.

Some detailed shaping taking place, the levers have been cut and laminated to create the slot for the toothed quadrant.

A close up of the system.

This gives a better idea of how it all fits together.

A front view of the setup, for some reason the left hand lever is bent much more forward than the right hand one. Why? I don't know.  

A nice closup showing the slot for the quadrant and how it all fits together.

Another view.

Sunday 10 July 2011

The drivers hood.

The hood was built up from flat plates with heat formings being used where necessary.
The shell showing the heat formed bulge which has been blended into the surrounding plastic.
Here you can see the plate inserts that were screwed down over the visor and mechanism.
The overhead hatch with the cut out for the periscope as well as the slight recessed machining for the rotation of the protective plate over it. 
The hinge was finished off. 
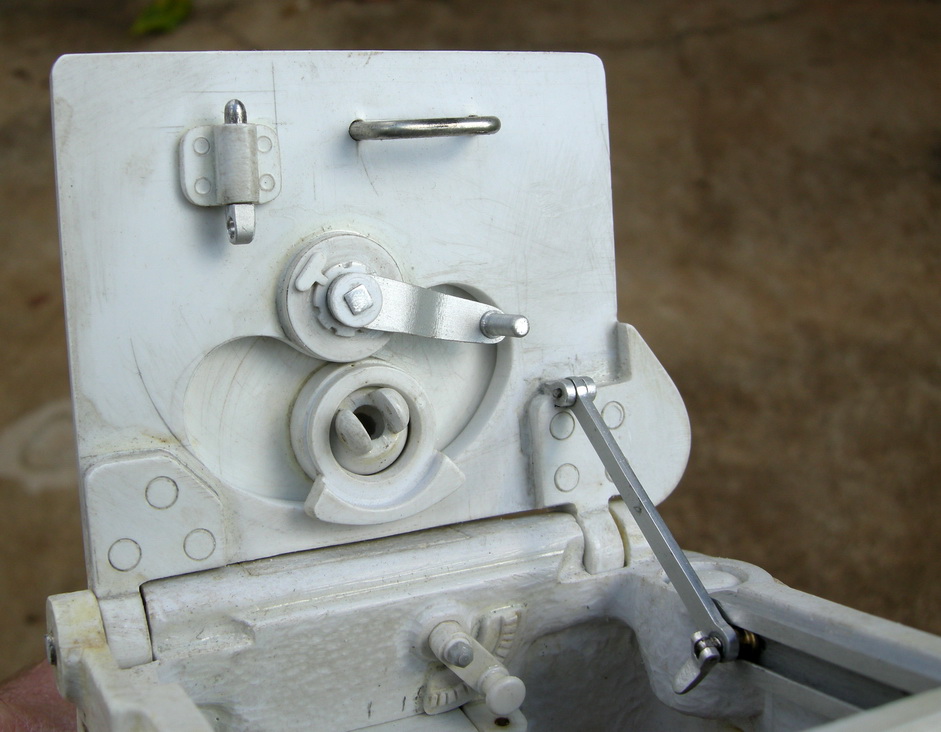
Some more shots of the inner face, showing the hinge attachments as well as the travel limiting arm.
More detailing done here.
A nice shot of the inner detail.
The hatch pretty much complete, the aluminium arm is for rotating the heavy overhead plate with integral periscope.
The rail for the hatch strut is added.
Another view.
Here you can see the drivers visor in the open position, this would have been opened during road trips out of action.

Upper hull grill.

The grill found on top of the hull was first drawn in Autosketch, with the drawing glued onto some styrene the grill ends were drilled out.

The grills were carfully cut out using a very sharp chisel then the slats were sanded using emery boards.

Although not shown the upper slats were glued on and when the glue had set I sanded the edges to give a better opening.

The grill as seen from above as well as some upper hull detail.

Some of the slits can be seen in this view.

When I first made this grill I did a half hearted effort and not being satisfied with the result I decided to rebuild it doing it properly this time. Here you can see the crappy part next to the better effort.  

From underneath there was no slat detail at all on the old build.

Another example of a part not being good enough that had to be rebuilt.